WCF Windows Authentication
This article explains about the creating the WCF service with Windows Authentication enabled.
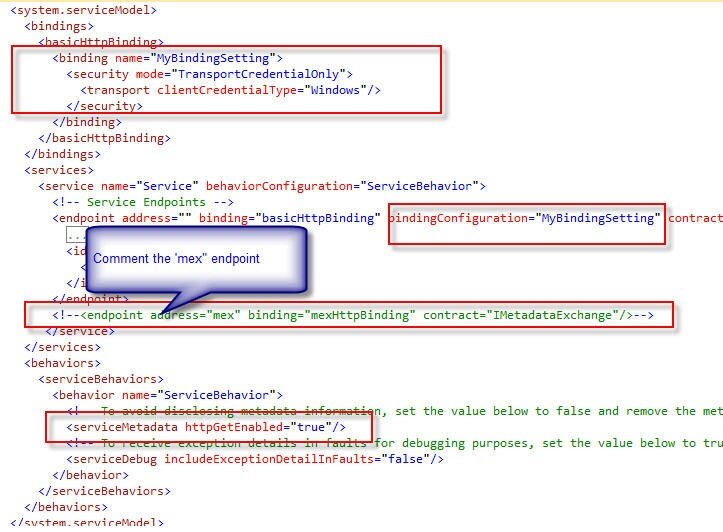
Step 1: Create the WCF service and hosted in IIS, change the configuration sections as mention below 
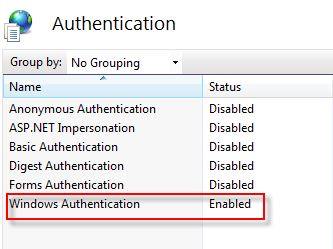
Step 2: Verify that only "Windows Authentication" is enabled in IIS Authentication settings 
Step 3: Create client application and create the proxy for the WCF service
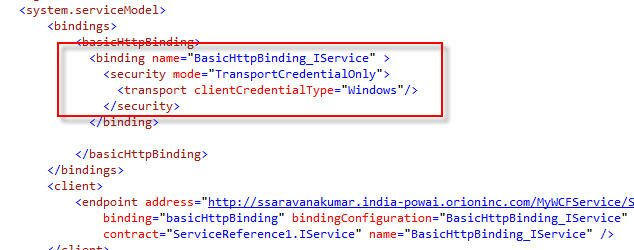
Step 4: Make sure that client side configuration are updated with "Windows" Authentication as mention below 
Step 5: Sample client code to consume the service 
Note: If Metadata Exchange Endpoint is enabled in service configuration , you will get below error. Make sure it is commented.
Security settings for this service require 'Anonymous' Authentication but it is not enabled for the IIS application that hosts this service
If Client and Service configuration is not properly configured with “Windows Authentication”, you will get below error. Make sure both are using same config settings.
The HTTP request is unauthorized with client authentication scheme 'Anonymous'. The authentication header received from the server was 'Negotiate,NTLM'.
Tips!
- Always create the service with Interface->Implementation format, mention the contract in Interface.
- Define the service in Class library and refer the class library in Host project. Don’t use service class in host project.
- Change the instance mode to per call as default.
- Always catch exception using try/catch block and throw exception using FaultException < T >.
- Logging and Include exception should be enable while compiling the project in debug mode. While in production deployment disable the logging and Include exception details.
|